
Repair of Leaky Valve and Faucet Hardware
Often, a leaky valve or faucet can be caused by problems with the hardware that makes up the mechanism used to turn water on and off. Luckily, these parts can be repaired without the help of a plumber.
Before beginning any repairs, make sure to cover drains to prevent old or new faucet parts from falling down the drain and causing more damage. Then, remove the handle, packing nut, and stem to access the parts that need to be replaced.
Replace the O-Ring
If you’ve been experiencing water leaking from the handle or the base of the faucet, it may be time to replace the O-ring. O-rings are responsible for preventing leaks from the actual faucet handles and can easily wear out due to age and normal use. A worn-out O-ring can also cause the faucet handle to feel loose or wobbly in your hands, which is another common sign that it’s time to replace this important part of the faucet.
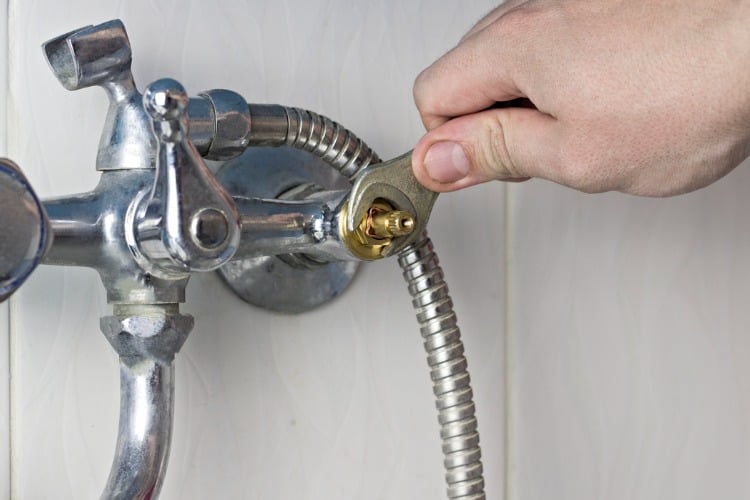
To replace the O-ring, first remove the faucet handle by unscrewing it from the handle nut using a screwdriver or Allen wrench. If the handle is particularly stubborn, a little penetrating oil can help loosen it. Once the handle is removed, you should see a cylindrical stem or cartridge that can be exposed by gently prying it with your fingers or a flathead screwdriver. Then you can remove the O-ring from the stem and inspect it for damage or wear.
Once the O-ring is replaced, it’s important to coat it with plumber’s grease to prevent future problems. The O-ring is available in a variety of sizes, so it’s a good idea to take the old one to a hardware store or consult your faucet’s user manual to determine the correct replacement size. The washer inside the valve seat should also be replaced, so make sure that it’s a matching size.
After replacing the O-ring and adjusting the retaining nut, you’ll need to install the new valve cartridge and reassemble the handle. Remember to keep track of all the parts as you remove them so that you can reinstall them in the proper order. Before you reinstall the handle, turn on the water and check for any remaining leaks. If you encounter persistent leaks after reassembling the faucet, it’s probably time to call in Delaware County Plumbers.
Repair the Valve Seat
A faulty valve seat can be repaired with some patience and tools. If you’re lucky, a quick repair may be as simple as replacing the O-ring and washer, but it could be more complicated. In some cases, a main part—such as a cartridge, stem, or ball—may need to be replaced. A professional plumber can help you decide if the repairs are worth the cost and effort.
First, shut off the water supply. Look for the fixture shutoff valves beneath your sink or in the basement. Once the water is off, you can begin disassembling your faucet. Start by removing the decorative cap at the top of each handle, which usually has an "H" for hot and a "C" for cold. If it’s stuck, try using penetrating oil to loosen the screw holding it in place. Next, unscrew the handles. If they’re stuck, be careful not to bang them free—you might break the inner workings. Once the handle is removed, you can remove the escutcheon and unscrew the disk cylinder mounting screws with a screwdriver. If the cylinder is pitted, you can replace it with a new one. If not, sand the valve seat with emery cloth to make it smooth and then coat it with nontoxic plumber’s grease.
Finally, replace the washer and O-ring. Be sure the replacement washer is an exact fit in the valve seat, and the O-ring is coated with nontoxic plumber’s grease to prevent it from sticking to the inside of the cylinder.
Once you’ve reassembled your faucet, turn it on to see if the leak is fixed. If not, you’ll need to find the cause of the leak and make any necessary adjustments or repairs. While you can try repairing the valve yourself, hiring a licensed plumber is more convenient and ensures that the job is done correctly. In addition, a licensed plumber is familiar with local plumbing codes and permits required when working on a water service. A plumber can also save you money by fixing the problem early, before it leads to a more expensive and extensive repair project.
Check Your Water Pressure
If your home’s water pressure has suddenly dropped, you probably have a leak somewhere. The low water flow could be due to a slow drip from a faulty valve or it could be caused by a burst pipe. Regardless of the source, low water pressure is not good for your pipes and it can lead to problems with faucets and showerheads, washing machines, dishwashers and other appliances. Checking your home’s water pressure a few times a year can help you catch these issues before they get worse.
When you test your water pressure, make sure to run hot and cold water through all the faucets in your home. This will allow you to determine if the problem is in one fixture or throughout your entire home. It’s also a good idea to check the basement and outside faucets too, as these are sometimes overlooked.
A leaky valve can be hard to notice if you only have low water pressure in specific fixtures. In this case, the problem is likely a clogged faucet aerator or the water line. Debris and rust can clog these so you should unscrew the end of the faucet, remove the aerator and clean it or replace it.
If you’re not sure what is causing your low water pressure, it’s always wise to contact your local water supplier. They can usually come out and look at the water supply lines to your home.
They’ll be able to tell you if your water pressure is normal and can offer suggestions for any repairs or improvements you can make to ensure consistent water pressure in your home. They may even be able to replace the pressure regulator on your home’s water line, which can also cause low water pressure in your fixtures and appliances.
If your home doesn’t have a pressure regulator, you can purchase one fairly inexpensively that screws into your hose bibb. You can then turn the water on and measure the pressure with a gauge, which should be set to read 75 psi. This will ensure that your water pressure is not too high, which can damage pipes and plumbing fixtures.
Replace the Washer
A washer sits between two parts and is used to fill any small gaps that water might be able to fit through. As with O-rings, they wear out over time and need replacing. Replacing the washer can help stop a leaky faucet and also prevent sediment from building up over time.
Before you do anything, turn off the water supply to the faucet. Then, close the drain or put a towel over it to avoid any small parts from falling down the drain. You can then lay out a towel on which to place the different pieces as you remove them. This will make it easier for you to reassemble them later on.
Start by removing the decorative cap from each handle. Typically, these caps are a circle that may have an H for hot or C for cold on them. You can then use a screwdriver to lift up the cap and expose the screw underneath. If the screw becomes seized, you can try using penetrating oil to loosen it. Once the cap is removed, you can then proceed to removing the knob or handles.
Next, you will need to remove the valve stem assembly. This will usually be held by a brass screw that is located on the bottom of the valve seat. You can use a wrench to unscrew the screw and then pull out the entire stem assembly. This will reveal the old washer, which you can then replace. Before you do so, however, you should clean the end of the washer holder to remove any debris or deposits from it.
Once you have replaced the washer, replace the nut or screw that held it in place and then reassemble the faucet. Afterward, you should test the water pressure to ensure that everything is secure. If the new washer was not an exact replacement, then it will most likely cause a drip, which you should fix immediately. You should also make sure that you buy the right washer for your faucet, as they are designed differently for hot and cold water.
Often, a leaky valve or faucet can be caused by problems with the hardware that makes up the mechanism used to turn water on and off. Luckily, these parts can be repaired without the help of a plumber. Before beginning any repairs, make sure to cover drains to prevent old or new faucet parts from…